
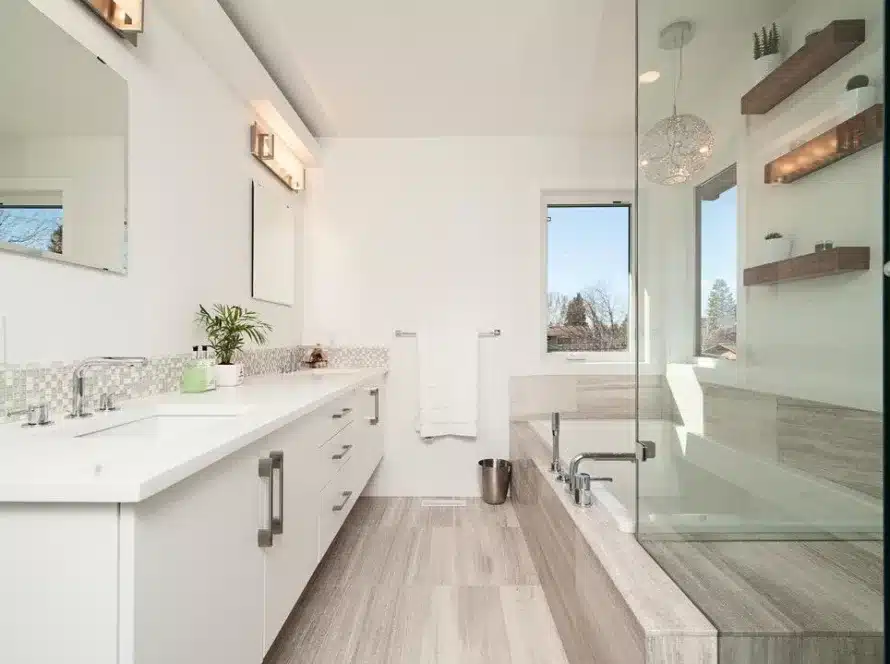
Are you considering a bathroom makeover or struggling with a leaky shower? The heart of any shower remodel lies beneath your feet – the shower pan.
A well-installed shower pan can prevent costly water damage and add value to your home. But how exactly is a shower pan installed?
This guide demystifies the process, offering clear, step-by-step instructions on shower pan installation. Whether you’re a DIY enthusiast or planning to hire a professional, understanding this process is crucial.
Read on to embark on your journey towards a successful shower remodel equipped with knowledge and confidence.
Understand the Basics of Shower Pan Installation
Before diving into the installation process, it’s essential to grasp what a shower pan is and why it’s a pivotal component in any shower remodel. This foundational knowledge will help you appreciate the importance of each step in the installation process and ensure your project’s success.
What Is a Shower Pan?
A shower pan, also known as a shower base, is the foundation of a shower enclosure. It’s a waterproof barrier at the bottom of the shower, designed to route water into the drain and prevent it from seeping into the surrounding areas.
Shower pans come in various materials, including acrylic, fiberglass, and custom-tiled versions. They are crucial in maintaining the structural integrity and water-tightness of a shower.
The design of a shower pan is not only functional but also aesthetic. It forms the floor of your shower and can be found in countless styles and shapes to fit different bathroom layouts and designs. There’s a pan to suit every space, from standard square and rectangular bases to neo-angle pans for corner showers.
Importance in Shower Remodel Projects
Selecting and installing a shower pan is vital when undertaking a remodel. A properly installed shower pan ensures four benefits.
Waterproofing
The primary purpose of a shower pan is to prevent water leakage. Water leaks can lead to significant problems like mold growth, rotting of wooden structures, and damage to the subfloor and surrounding areas.
Longevity
A well-installed shower pan can last many years, making it a cost-effective investment. It reduces the need for frequent replacements and repairs, saving homeowners money and time in the long run.
Safety
A correctly installed shower pan helps prevent water buildup, reducing the risk of slips and falls. Some pans have built-in anti-slip textures for added safety.
Value Addition
A stylish and functional shower enhances your bathroom’s overall appeal and value. Whether you plan to sell your home or enjoy it for years, a well-executed shower remodel with a high-quality shower pan installation adds significant value.
Preparation For Installation
Proper preparation is vital to a successful shower pan installation. This preparation begins with gathering the right tools and materials and measuring your space to select the most suitable shower pan.
Tools and Materials Needed
For a smooth installation process, you’ll need various tools and materials. Here’s a comprehensive list:
- Measuring Tape: Essential for accurate measurements of your shower area
- Level: To ensure your shower base is perfectly horizontal
- Drill: For making holes, especially when securing the shower pan or attaching the drain
- ScrewdriverSet: For various installation tasks
- Utility Knife: Handy for trimming and cutting where necessary
- Plywood and 2x4s: If you need to build a support frame
- MortarMix: Used for setting some types of shower pans
- SiliconeSealant: Essential for waterproofing edges and seams
- Pencil or Marker: For marking drill holes or cutting lines
- Safety Glasses and Gloves: For personal protection during the installation process
Ensure you have all these tools and materials before starting the installation to avoid interruptions.
Measure and Select the Right Shower Pan
Choosing the right shower pan starts with precise measurements of your shower area. Measure the length and width of the space where you want to install the shower pan. It’s crucial to note any irregularities in wall angles or existing fixtures.
When selecting a shower pan, consider:
- Size: Ensure the pan fits your measured area
- Material: Options include acrylic, fiberglass, and tile-ready pans
- Drain Location: Match the pan’s drain location with your existing plumbing
- Style: Choose a pan that complements the overall design of your bathroom
Taking the time to measure and choose the right shower pan will make the installation smoother and ensure a better fit.
Remove the Old Shower Base (If Applicable)
Removing the old shower base is the first physical step in the installation process if you’re remodeling an existing shower. You should approach this task with care and precision, following a step-by-step process to avoid damage to surrounding areas.
- Turn Off the Water Supply: Before starting, ensure the water supply to the bathroom is turned off to prevent any accidental water flow
- Remove Any Doors or Panels: If your shower has doors or panels, carefully remove them to access the base
- Disconnect the Drain: Unscrew, remove the drain cover and disconnect the drain from the shower base
- Cut Away Caulk and Sealant: Use a utility knife to cut away any caulk or sealant around the edges of the shower base
- Remove Fixtures and Accessories: Remove any fixtures or accessories attached to the shower base or nearby walls
- Pry Up the Shower Base: Gently pry up the edges of the shower base
- Inspect the Area: Once the base is removed, inspect the area for any water damage or mold
SafetyTips
Ensuring safety is paramount during any shower pan installation process. These tips focus on protecting yourself and your home, covering essential precautions and best practices to follow as you undertake this important project.
- WearProtectiveGear: Always wear safety glasses and gloves to protect yourself from sharp edges and debris
- Beware of Plumbing: Be cautious when dealing with plumbing connections
- AvoidForcefulImpact: Don’t use excessive force, as it can damage plumbing or the structure of your bathroom
- Check for Asbestos: In older homes, be aware of the possibility of asbestos in flooring materials
- Proper Disposal: Dispose of the old shower base according to local regulations, as some materials may require special handling
Removing the old shower base with attention to detail and safety precautions sets a clean slate for the new installation, ensuring a smoother and more efficient process.
Prepare the Installation Area
Adequate preparation of the installation area is crucial for a successful shower pan installation. This involves cleaning, leveling the surface, and addressing any plumbing considerations to ensure smooth installation.
Clean the Area
Start by thoroughly cleaning the area where you will install the shower pan. Remove any debris, dust, or old building materials. This ensures a clean surface for the new installation.
Check For Level
Use a level to check the floor where the shower pan will sit. This surface must be as level as possible to prevent future drainage issues.
Make Adjustments
If the surface is not level, use a self-leveling compound to even it out. Follow the manufacturer’s instructions for application and drying time.
Final Cleaning
Once the surface is level, it’s important to clean it again. This removes any dust or particles that could interfere with the installation of the new shower pan.
Inspect Existing Plumbing
Examine the current plumbing setup, especially the drain. Ensure it’s in good condition and properly aligned with the new shower pan.
Make Necessary Adjustments
If adjustments are needed, it might involve some plumbing work. A professional plumber may need to reposition the drain or alter the water supply lines.
Waterproof
Consider applying a waterproof membrane around the drain area to prevent leaks. This step is crucial, especially in custom-tiled shower pans.
Consult a Professional
If you’re not confident in your plumbing skills, it’s advisable to consult a professional plumber. Proper plumbing alignment is critical to the functionality of your shower.
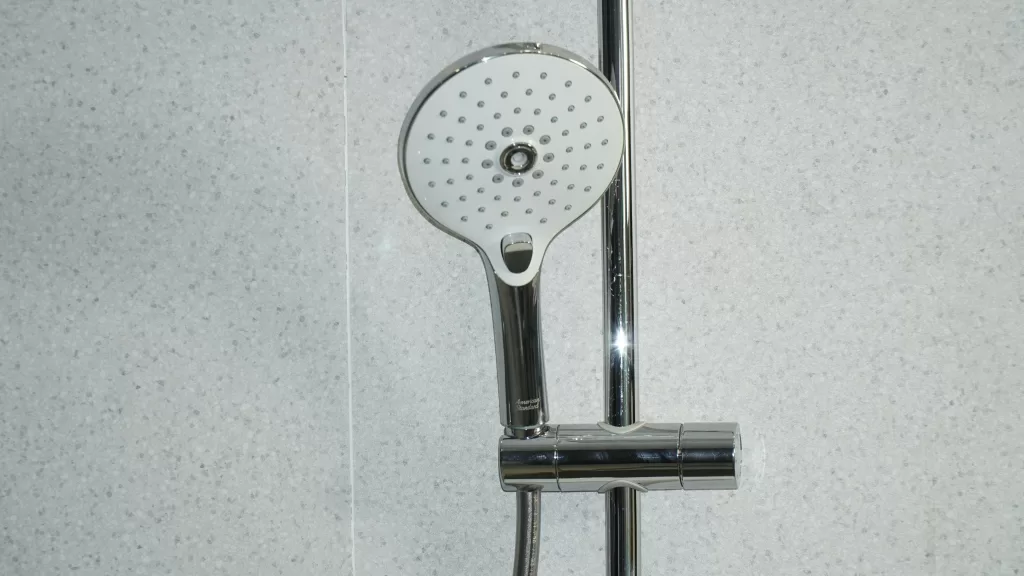
Install the Drain Body
Proper installation of the drain body is a critical step in shower pan installation. Precision and attention to detail are required to ensure a leak-free and efficient drainage system.
Follow these instructions to ensure a precise and secure drain body installation in your shower pan.
Identify the Drain Location
Begin by locating the exact position of the drain with the shower pan. Ensure that the drain body aligns with the hole in the shower pan.
PreparetheDrainBody
Assemble the drain body according to the manufacturer’s instructions. This involves attaching components like the flange, gasket, and drain assembly.
Apply Plumber’s Putty
Roll the plumber’s putty into a rope shape and wrap it around the underside of the drain flange. This helps create a watertight seal between the drain and the shower pan.
Insert the Drain Body
Carefully insert the drain body into the hole in the shower pan. Press it firmly to ensure the plumber’s putty spreads evenly, creating a seal.
Secure the Drain
Attach any washers and nuts that come with the drain assembly from below the shower pan. Tighten them, but be careful not to over-tighten them, as this can crack some shower pans.
Remove Excess Putty
Check for any excess plumber’s putty once the drain is in place. If anything is oozing around the drain flange, carefully remove it for a clean finish.
Connect to the Plumbing
Align and connect the drain body to the home’s plumbing. This step might require PVC or ABS cement if you’re working with plastic pipes or additional fixtures for other types of plumbing.
Double-Check Alignment
After installing the drain body, ensure it is aligned with the drain hole in the shower pan and the plumbing below. Misalignment can cause leaks or drainage issues.
Test For Leaks
Before finalizing the installation, first, conduct a water test. Then, block the drain and fill the base with water. Next, check for any leaks around the drain body and the connection to the plumbing.
Adjust if Necessary
Adjust the drain body and reapply the plumber’s putty or sealant if any leaks are detected. Addressing any issues at this stage is crucial to prevent future problems.
Installing the drain body and ensuring proper alignment and seal can ensure efficient drainage and avoid water damage. This sets a solid foundation for the rest of your shower pan installation.
Place the Shower Pan
Once you install the drain body and the installation area is prepped, the next crucial step is correctly placing the shower pan in. This process requires careful handling and alignment to ensure a perfect fit and prevent future issues.
Do these things first for a successful shower pan installation.
Dry Fit the Shower Pan
Before applying any adhesive or mortar, place the shower pan in the designated area to ensure it fits. Check the alignment with the walls and the drain.
Apply Mortar or Adhesive
If your shower pan requires it, prepare a batch of mortar according to the manufacturer’s instructions. Apply an even layer of mortar or adhesive on the floor where you place the pan. This provides a solid base and helps level the pan.
Place the Shower Pan
Carefully lower the shower pan onto the mortar or adhesive, aligning it with the drain and the walls. Press down gently but firmly to ensure good contact with the mortar.
Secure the Pan
Follow the manufacturer’s instructions to secure the pan to the floor. This may involve screwing flanges to the wall studs or applying silicone around the edges.
Check For Level
Once the pan is in place, use a level to check that it is even. Adjust as needed while the mortar is still pliable.
Allow to Settle
Leave the shower pan to set as per the manufacturer’s recommended time. Do this before proceeding with further installation steps or using the shower.
Tips For Ensuring a Perfect Fit
A perfect fit is crucial to ensure functionality and longevity in shower pan installation. These tips will guide you through key considerations and techniques for a flawless fit.
- Measure twice, install once
- Handle with care
- Watch the edges
- Be mindful of the drain
- Use the right materials
A well-fitted and securely installed shower pan lays the foundation for a leak-free and durable shower installation.
Secure and Seal the Shower Pan
The next critical steps are securing the shower pan and ensuring a watertight seal once the shower pan is properly placed and aligned. This stage is vital to prevent leaks and ensure the longevity of your shower installation.
This section explores reliable techniques and best practices to achieve a perfect leak-proof seal.
Apply Silicone Sealant
Use a high-quality silicone sealant along the edges where the shower pan meets the walls. Be generous but precise with the sealant to avoid gaps.
Smooth the Sealant
Use a caulking tool or your finger (wearing a glove) to smooth the sealant. This not only looks cleaner but also ensures a better seal.
Seal the Drain Connection
Ensure the area around the drain is also well-sealed. This might require additional plumber’s putty or specialized sealing products, depending on the type of drain and pan.
Allow Time to Cure
Follow the manufacturer’s instructions regarding the curing time for the sealant. It’s crucial to let the sealant dry completely before using the shower to prevent moisture penetration.
Test For Leaks
Ensuring your shower pan is leak-proof is a critical step in the installation process. The following sections offer guidance on effective techniques for testing for leaks and ensuring the integrity of your installation.
Visual Inspection
Before conducting a water test, do a thorough visual inspection of all sealed areas. Ensure there are no visible gaps or inconsistencies in the sealant.
The Water Test
Block the shower drain and fill the base with water. Let it stand for several hours, then check for any signs of water leakage underneath or around the shower pan.
Check the Drain Connection
Pay special attention to the area around the drain, as this is a common site for leaks. Look for any moisture or water marks on the surrounding surfaces.
Address Any Leaks Immediately
If you find any leaks, drain the water, dry the area, reapply the sealant, or make necessary adjustments. It’s crucial to fix these issues before proceeding with further installation steps.
Finish Touches and Cleanup
After securing and sealing the shower pan, it’s time to apply the finishing touches and clean up the area.
These final steps are essential to not only give your shower a polished look but also to ensure everything is in perfect working order.
Choose the Right Caulk
Select a mold and mildew-resistant caulk suitable for bathrooms. This will ensure a long-lasting and hygienic finish.
Caulk the Edges
Apply caulk around the edges where the shower pan meets the walls. This not only seals gaps but also provides a neat, clean line that enhances the appearance of your shower.
Install the Trim
If your shower pan design includes trim or decorative elements, install them according to the manufacturer’s instructions. This trim not only adds aesthetic appeal but also helps in concealing any uneven edges or gaps.
Smooth and Clean the Caulk
After applying, smooth out the caulk with a damp finger or a caulking tool for a professional finish. Wipe away any excess caulk with a damp cloth for a clean look.
Check the Sealant and Caulk
Ensure that all sealant and caulk lines are even without gaps. Pay special attention to corners and edges.
Inspect the Drain
Make sure the drain is securely fitted. There should be no signs of leakage around it.
Verify Levelness
Double-check that the shower pan is level. An uneven pan can lead to water pooling and potential water damage.
Look for Cosmetic Flaws
Examine the shower pan and surrounding areas for any scratches, dents, or other cosmetic issues that may have occurred during installation.
Clean the Area
Remove any installation debris, tools, and materials. Clean the shower pan and surrounding area, leaving it ready for use.
Understanding Shower Pan Installation Costs
Knowing the different components that contribute to the overall cost, from the type of pan to labor expenses, is crucial for an accurate financial plan. Being informed about these factors allows you to make cost-effective decisions while ensuring a high-quality installation.
Type of Shower Pan
The material and design of the shower pan can impact the cost. Custom-tiled pans are usually more expensive than prefabricated acrylic or fiberglass options.
Size and Complexity
Larger shower pans and those with complex shapes and drain configurations often have higher costs. This is due to the increased material and labor requirements for their installation.
Labor Costs
If hiring a professional, labor costs can vary. Those costs are based on the complexity of the job and the rates in your area. Also, the experience and reputation of the professional or company you choose can also influence the labor costs for your project.
Additional Materials
Costs for additional materials such as mortar, sealant, and plumbing supplies can accumulate. These expenses can impact your project’s overall budget.
Removal of the Old Shower Base
If your project requires the removal of an old shower base, this task can increase the overall cost. The extra labor involved and potential disposal fees contribute to these additional expenses.
DIY vs. Professional Installation
Opting to install the shower pan yourself can save on labor costs. However, home improvement projects require a certain level of skill and comfort.
Hiring a professional ensures that the installation adheres to industry standards and building codes, providing peace of mind. Their experience allows them to complete the job more quickly and accurately, potentially avoiding costly mistakes and future repairs.
Why Choosing a Professional For Your Shower Pan Installation Is the Smart Choice

Compare Quotes from Top-rated Bathroom Remodel contractors in your area.
Installing a shower pan may seem daunting, but it can be a manageable project with the right guidance and tools. However, the complexities involved, from ensuring a perfect fit to creating a watertight seal, often require professional expertise.
Alpha Living connects homeowners with experienced contractors for all their home improvement needs – from shower remodels to comprehensive bathroom renovations.
Rather than navigating this intricate process alone, let the experts at Alpha Living ensure your shower pan installation is done right the first time, saving you money, time, and potential headaches.
Enter your zip here to find a skilled bathroom contractor near you!


Facebook
Comments